How do you make perfect rice in an Instant Pot?
The question we get asked more than any other is: “How do you make perfect rice in an Instant Pot?”
 Cooking rice can be tricky. A lot depends on personal and cultural preferences, and even if we could all agree on the “perfect rice,” the altitude of your location, the hardness of your water, and the age and dryness of the rice all play a role in the results you get.
The question we get asked more than any other is: “How do you make perfect rice in an Instant Pot?”
Cooking rice can be tricky. A lot depends on personal and cultural preferences, and even if we could all agree on the “perfect rice,” the altitude of your location, the hardness of your water, and the age and dryness of the rice all play a role in the results you get.
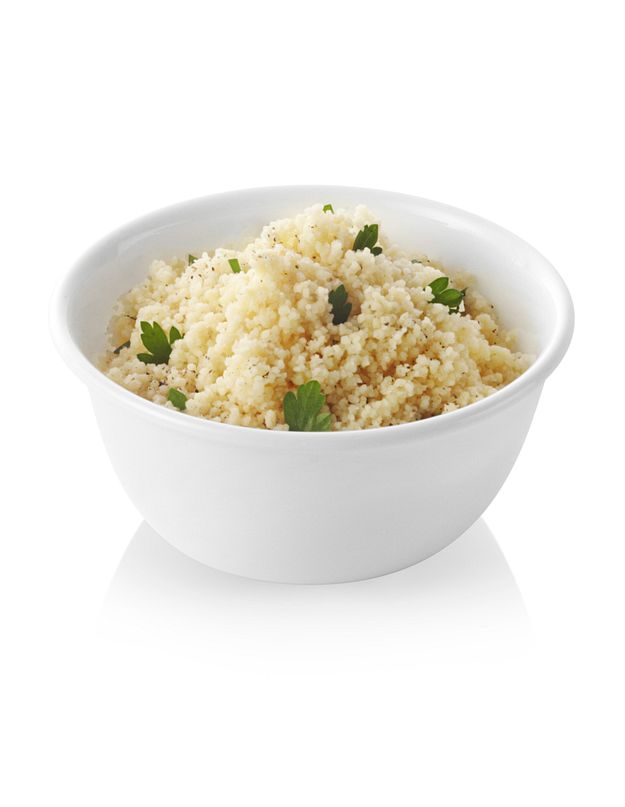
So how do you make perfect rice? The quick answer is: measure a 1:1 ratio of water-to-rice, rinse your rice before adding it to the Instant Pot, then set it and forget it!
The Instant Pot Rice Program
If you’re using the ever-popular parboiled, or long grain white rice, the handy “Rice” Smart Program was made precisely you. This setting automatically adjusts the time based on the volume of rice you add to the inner pot, so it truly is a one-button operation.
Manual Pressure Cooking
If you’re using a different kind of rice, select the “Pressure Cook” Smart Program (called “Manual” in some models). You’ll need to adjust the cook time depending on the grain:
- Basmati (white) rice: 4-8 minutes
- Jasmine rice: 3-5 minutes
- Brown rice (long/short): 22-28 minutes
- Wild rice mix: 25-30 minutes
Instant Pot 1:1 Perfect Rice Recipe
If you want to know why this recipe works, keep reading. If you just want to get cooking, here’s the 1:1 recipe up front:
- Measure out dry rice, set aside. We recommend using directly in the inner pot. (For smaller amounts, use the pot-in-pot method.)
- Measure out the same amount of water, then add it to Instant Pot’s inner pot.
- Rinse the rice, then add the wet rice to the water in the inner pot. Never fill your inner pot past the half-way mark when cooking rice.
- Place the inner pot into the cooker base, then plug in your Instant Pot.
- Close the lid, and set the steam release to the “Seal” position.
- Select your pressure cooking time.
- The “Rice” Smart Program automatically sets the time for white or parboiled rice only.
- For other types of rice, use the “Manual” or “Pressure Cook” Smart Program on High and use + and – to set the correct time depending on your preferences and any local issues, like high elevation or a large amount of rice.
- Turn “Keep Warm” off.
- Do a natural release (NR) to release pressure from your cooker.
- When the float valve has dropped, open your Instant Pot, then fluff, serve and enjoy your perfect rice.
This approach combines thorough in-house research and testing with the anecdotal experience of hundreds of home cooks who’ve perfected making perfect rice in their Instant Pots. Of course, it’s just a starting point to work from. Everyone’s tastes are different! You may find that you want to adjust the 1:1 recipe in order to make the perfect rice for you.
Why does this work?
The reason why the 1:1 ratio works is that no matter what kind of rice you’re using, they all need to absorb the same amount of water while they cook. Conveniently, every kind of rice needs to absorb its own volume in water, giving us the very easy-to-remember 1:1 ratio.
Are you sure you don’t you need more water?
You’re probably used to using a lot more water when you cook rice, but using regular pots or rice cookers lets out a ton of steam. Because the Instant Pot is a sealed pressure cooker, very little water is lost to evaporation, so you can use a lot less.
Most people find that the 1:1 ratio produces the perfect result, but if you like your rice a little softer, you can add a little more than the recommended 1 cup of water per cup of dry rice.
To ensure that the rice cooks evenly, it is not recommended to use less than 1 cup of water per cup of rice.
Do I have to rinse the rice first?
For this recipe, yes. Rinsing rice not only removes some starch, but it also adds a little extra water to compensate for the small amount that is lost to evaporation. If you choose not to rinse your rise, measure out a few extra tablespoons of water.
Exactly how long do I cook the rice?
While the exact amount of water you use depends on how you like your rice, the exact length of time you cook your rice depends upon your specific conditions. For example, altitude can make a big difference. If you are cooking a large amount of rice, you may need to add a few extra minutes to the cooking time. That’s why we provide a range of times for different varieties of rice.
The goal is to stop cooking when all the water has been absorbed by the rice. If you open the cooker, give it a stir, and find there’s still unabsorbed water in the inner pot, then you’ll need to cook it a bit longer.
Do I have to use Natural Release of the pressure?
Yes!
Waiting for the pressure to drop naturally avoids the problem of rice sticking to the bottom of the inner pot.
If you are in a hurry, we recommend using Natural Release for 10 minutes before releasing the rest of the pressure using Quick Release. Just don’t touch the steam release until at least 10 minutes have passed. Not if you want perfect rice, anyway.
Help, my rice is sticking to the bottom!
Did you do a Quick Release? You have to let the pressure go down with Natural Release or the rice may stick to your inner pot.
Also, make sure “Keep Warm” is off. The heat from “Keep Warm” may continue to cook the rice and make it stick to the bottom if it sits for too long.
How much rice can I cook?
We recommend a minimum of 1 cup of dry rice directly in the inner pot. If you’re cooking less, use the pot-in-pot method.
You can use the 1:1 recipe for any amount, but remember to never fill your inner pot past the halfway mark when cooking food that expands, such as rice.
If you are cooking a lot of rice, you may find you need to add a minute or two to the cooking time.
Do I have to use water?
Yes and no. The ratio calls for 1:1 water-to-rice, and while rice requires a water-based liquid to cook properly, you can absolutely play around with flavor by using different liquids in place of plain water.
Substitute some or all of the water you use for another liquid, such as chicken, beef, or vegetable stock. You can even try mixing half coconut milk and half water (using all coconut milk may give imperfect results).
For an extra dose of yummy, try stirring in a little bit of lime juice, mirin, soy sauce, chopped cilantro or green onions, or other flavor boosters just before you serve.
Do you need to add salt or butter?
You don’t need to, but you sure can add salt or butter if you want. A lot of people like a pinch or two of salt or a tablespoon or two of butter added before cooking. It all depends on your specific tastes.
How did you figure this out?
We do a lot of testing on our Smart Programs and recipes, and because rice is so popular and fundamental to the Instant Pot experience, well, we made rice—a lot of rice. More rice than anyone should ever have to make in their lifetime. We can safely say that we’ve experimented with rice more than anything else, and the proof is in the (rice) pudding!
Of course, we’re not the first. Not even close. People from countless cultures around the world have been cooking rice for thousands of years, and myriad “tried-and-true” techniques have been developed over time. The rice cooker has long been a popular appliance, designed to do one thing and one thing only: make rice. These rice cookers are just one of the many appliances the Instant Pot replaces, and many are finding that the Instant Pot does a better job!
One Instant Pot enthusiast, Deborah K., wrote to us to share her success using the Instant Pot to cook traditional Japanese rice:
“The ratio of Rice to Water is 1:1.25 (same as brown rice). I rinsed rice; used rice button on Instant Pot; 10-minute natural pressure release. The rice was perfect – even better than when I use our Japanese electric rice cooker (and verified by my Japanese-born family members who did not realize that my “best rice ever” was cooked in your pressure cooker).”
Another Instant Pot user reported awesome results with the same ratio when cooking brown rice:
“I cook brown rice for 22 minutes – 1 cups of rice with 1 1/4 cups of water – and that was pretty much the most perfect rice I’ve ever cooked”
These home cooks found that for cooking 1 cup of rice, 1.25 cups of water gave them great results, but what if you want to cook more rice at one time?
Jill Nussinow, The Veggie Queen, advocated a “sliding-scale” of water to rice in her popular pressure cooking cookbook, “The New Fast Food”. She revealed in our Instant Pot® Community Facebook group how she first came up with this:
“My job was to acquire recipes to use, as well as helping direct the writing of the programs to get the software that would adjust for number of servings to work correctly. This is where the algorithms came in. I learned a lot and have passed it on to many people.”
Cook’s Illustrated produced a video about why traditional methods of making rice in an ordinary pot call for different ratios of water to rice. The reason is evaporation. Old methods of cooking let a lot of water escape as steam, and the longer it took to cook the more water evaporated, so the more water you had to add at the start.
Remember that the Instant Pot is a sealed environment with very little evaporation. All the water you add is absorbed by the rice, so it doesn’t matter how long it takes to cook, the amount of water needed is the same: one cup of water per cup of rice. It doesn’t even matter what kind of rice it is, because all rice absorbs its own volume of liquid when cooking.
After discussing this approach with Flo Lum, a favorite Instant Pot video creator, she observed:
“This is probably why the ‘Chinese’ methods actually makes sense now. There are two methods… One uses your full hand: when placed barely on top of the rice, the water should reach a certain point on the top of your hand. And the knuckle method: where you stick your middle finger tip into the water, barely touching the top of the rice, the water should reach the first knuckle. I never understood how it worked but now sort of makes sense. Ancient Chinese secrets.”
That is why the ideal water-to-rice ratio in the sealed environment of the Instant Pot is 1:1, using rinsed (wet) rice of any kind. After rigorous testing, it has been confirmed here in our test kitchen, as well as in millions of Instant Pot homes around the world.
It’s official: 1:1 ratio of water makes perfect rice
Reviews have been overwhelmingly positive. Nobody complains about mushy rice anymore, although some do find that the 1:1 method produced rice that is too “al dente” for their preferences; these people found that simple adding a bit more water fixed that.
So the next time you make rice in your Instant Pot, consider the 1:1 ratio of rice to water for your starting point. If it’s not quite right, try adding a little more water until you find the sweet spot that makes your perfect rice, every time.
What now?
Now that you know how to make perfect rice, how about trying out some other Instant Pot recipes to go with it? Visit our Recipes site to learn more!
Would you like more of this kind of useful information? Sign up for our newsletter for the latest news, useful tips and advice, delicious recipes, and special offers. We email at most once a week.